Top 10 Strain Relief Mistakes Wreaking Havoc on Your Crane Cables
If there’s one thing I enjoy most about my job, it’s going on-site to visit our customers and get hands-on with their energy chain or drag chain systems. Quite often while making these site visits, I’ve noticed the most common corrective action I report revolves around cable strain relief. Being such a small component of a much larger system, strain relief clamps and cable tension have the tendency to be easily overlooked.
Why is the strain relief system so important you may ask? Simply put, improper strain relieving can lead to the premature wear of the cables and hoses as well as cause other conditions which could adversely affect the performance of the energy chain system. Cable jacketing flat spots, jacket bunching, or exposed conductors are all good indicators that there is a cable tension issue present.
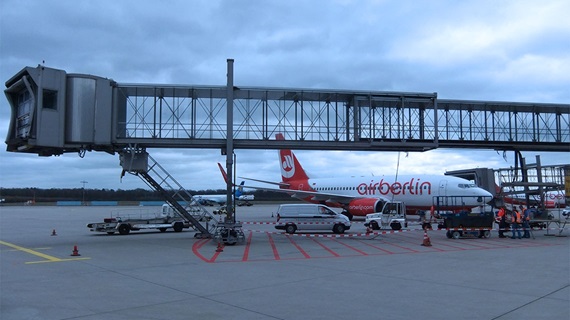
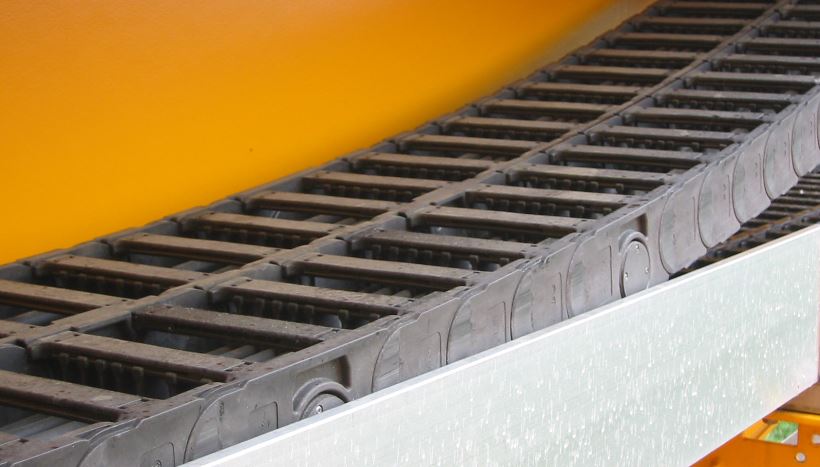
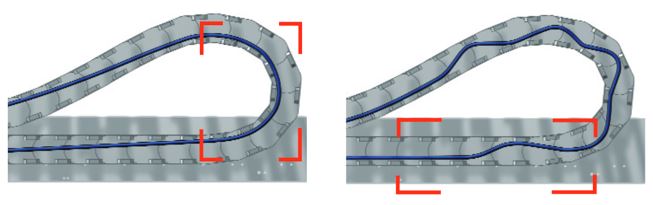
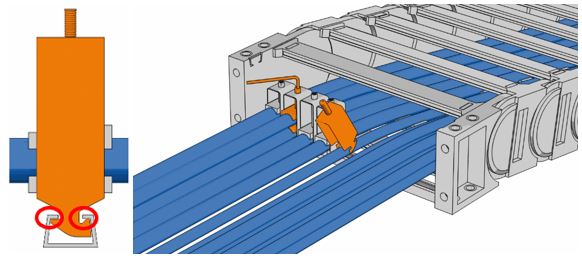
Before taking a dive into the issues I’ve spotted in the field, let’s review what a proper and improper cable installation looks like. The double rows of strain relief clamps located at both the fixed and moving ends of the energy chain are responsible for maintaining proper cable tension. If you observe that the cables are loosely pushing against the outer radius of the chain or pulling tightly against the inner radius of the chain, adjustment is required. When properly tensioned, the cables should lie in the chain’s neutral axis. Check out the images below for reference.
Pictured left, cable is pulling tightly against the inner radius. On the right, the cable is too loose within the energy chain.
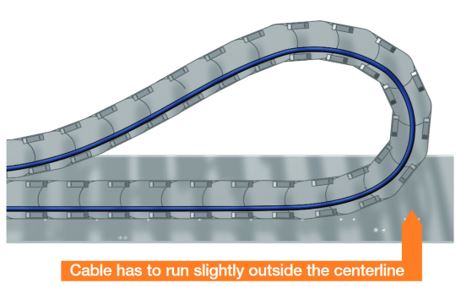
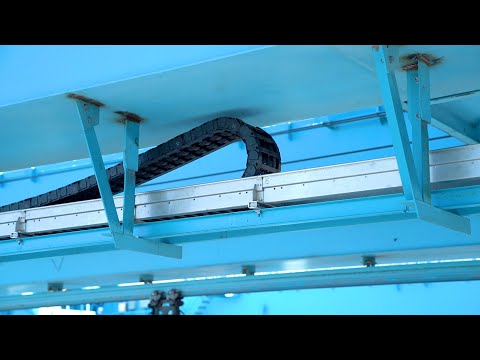
When strain relieved properly, cables will remain in the neutral axis of the chain's bend radius. Check out this video on strain relief to learn more!
Did you know? The set screw on our clamps can be adjusted using a 3mm Allen key. Now, let's get back to the 10 strain relief mistakes wreaking havoc on your cables.
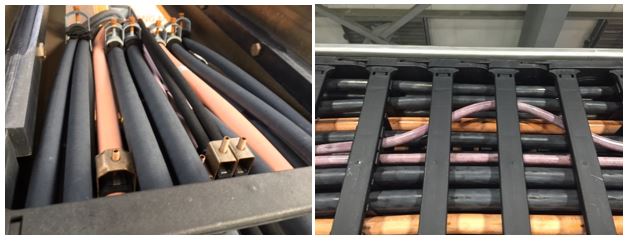
1. Missing or Incorrect Strain Relief Clamps
This find is pretty self-explanatory. As you can see, clamps have gone missing entirely or were replaced by non-igus clamps. This can have many adverse effects, including an excessive buildup of cable within the chain as shown in the 2nd picture.
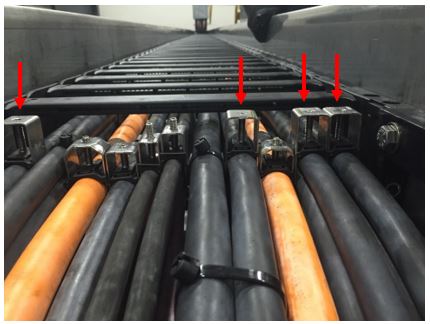
2. Clamps Facing the Wrong Direction
That’s right - the directional arrows on top of the strain relief clamps serve a purpose! In order to negate push and pull forces exerted on the cables during operation, crane applications with two rows of strain relief must face the clamps in opposite directions. Easy rule of thumb – the arrow on the first row of clamps will always face towards the chain. The arrow on the second row of clamps will always face the opposite direction.
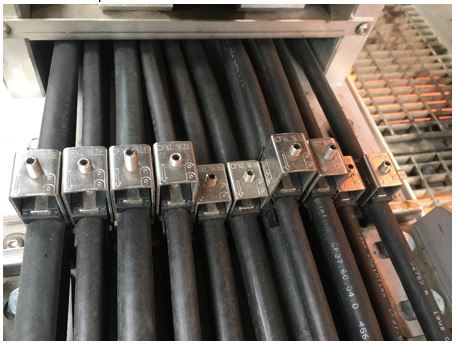
Close up of the first row of clamp arrows facing towards the E-Chain.
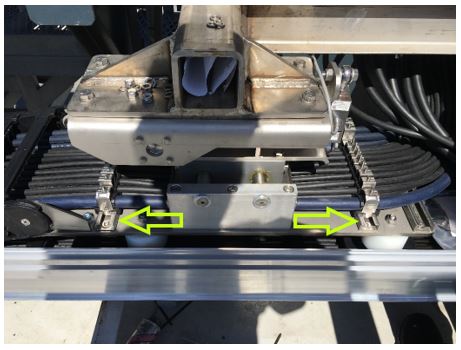
The green arrows indicate the correct direction the clamps should be facing.
3. Clamps Not Properly Seated
Each clamp has ‘toes’ that angle into the Unistrut or profile rail to which they are mounted creating a secure fit. If the clamp is not seated on the flat surface of the toe, the clamp housing will sit at an angle, tilting forwards or backwards instead of straight up and down.
The image to the left illustrates how the clamp should be seated on the profile rail. The image to the right illustrates how a clamp should be installed with the large end of the foot inserted into the rail first.
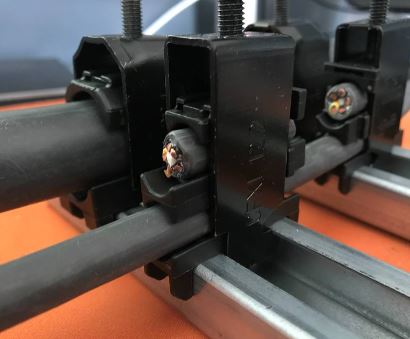
4. Incorrect Clamp Size – Clamp Oversized & Overtightened
When the clamp is oversized and overtightened, clamp housing is too big relative to the cable’s diameter. The clamp is tightened so much that the set screw becomes flush with the top of the clamp housing. This does not create a secure hold and risks pulling the set screw through the clamp housing.
5. Incorrect Clamp Size – Clamp Too Tall
This instance is observed less frequently since the damage is typically already done by the time we’ve arrived. This only applies to clamps installed on the fixed end of chain where the upper run of chain will pass over. A clamp that is too tall will catch the gliding, upper run of chain – ripping out the clamp and potentially causing damage to the chain and surrounding cables. As a rule of thumb, there should be ample space between the set screw/clamp housing and crossbar. The picture below shows that the clamps are almost flush with the top of the crossbar – way too close for comfort.

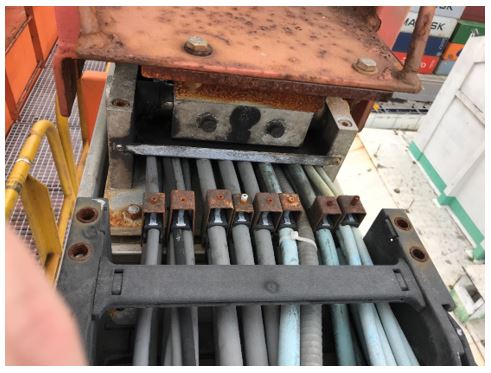
6. Missing Cable Saddles
Most crane applications will have two types of strain relief clamps – single cable or double stacked. Single cable clamps have one base saddle that clips into the profile rail. Double stack cable clamps will have one base saddle + a middle saddle. Missing saddles on either of these clamp styles could create cable ‘hotspots’ where accelerated jacket wear is observed. Missing bottom saddles can result in cable shorts and crushed jackets and missing middle saddles compromise the holding force of the clamps.

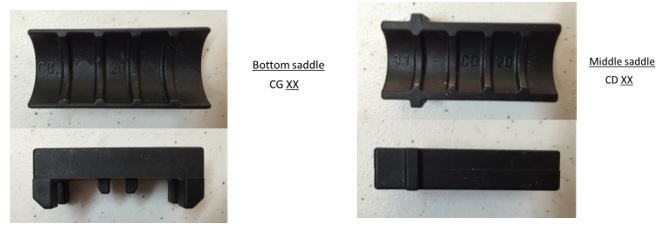
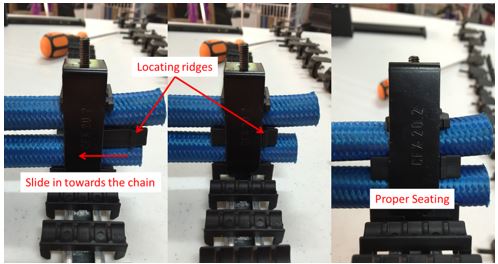
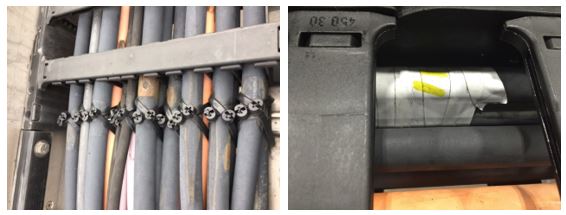
7. Middle Saddles Incorrectly Installed
If you take a close look at the middle saddle pictured above, you will notice a ridge that secures the middle saddle in place. This prevents the saddle from pulling through the clamp. When installed, this middle saddle should slide between two cables towards the chain, with the ridge making contact with the metal clamp housing. See the illustration below for a great depiction of how these middle saddles should be oriented
8. Chainfix Clamp "Spacers"
MacGyver would be proud of this quick fix, but unfortunately, it does not offer a long-term solution to secure cables. In this scenario, double stack clamps were used in a bind when single cable clamps were not on-hand. To make these clamps work, pieces of cut cable ‘spacers’ were used to fill the void of the phantom cable. Spacers dislodge and fall out easily, leaving in-use cables unsecured.
9. Jamming Too Many Cables Under One Clamp
Seems effective, right? Not exactly…as you can imagine, these cables were not well secured and had heavy jacket wear.
10. Using Zip-ties or Tape to Secure Cables
The pictures below are actually quite common when clamps go missing. Unfortunately, these both create the ‘hotspots’ mentioned earlier – accelerating jacket wear at the points of contact.
Now that you know what NOT to do (along with a few ways to optimize your strain relief setup), grab your 3mm Allen key and get ready to make some adjustments! Any components of our system you want to learn more about? Let us know and we will cover it in our next blog post. Remember, advice regarding cable adjustments or strain relief is only a phone call away – your igus® team is ready to help!
If you would like to know more about how igus® energy chains can save you and your company money or would like us to consult with your company, please reach out to me today to schedule a visit.
To learn more about all of igus® cable management for cranes please visit our website: www.igus.com/cranes
Or feel free to email me directly at dkortkamp@igus.net